
When Matt and I first moved into our farmhouse fixer-upper, one of the first things we noticed were the plantation shutters on the inside of the windows.
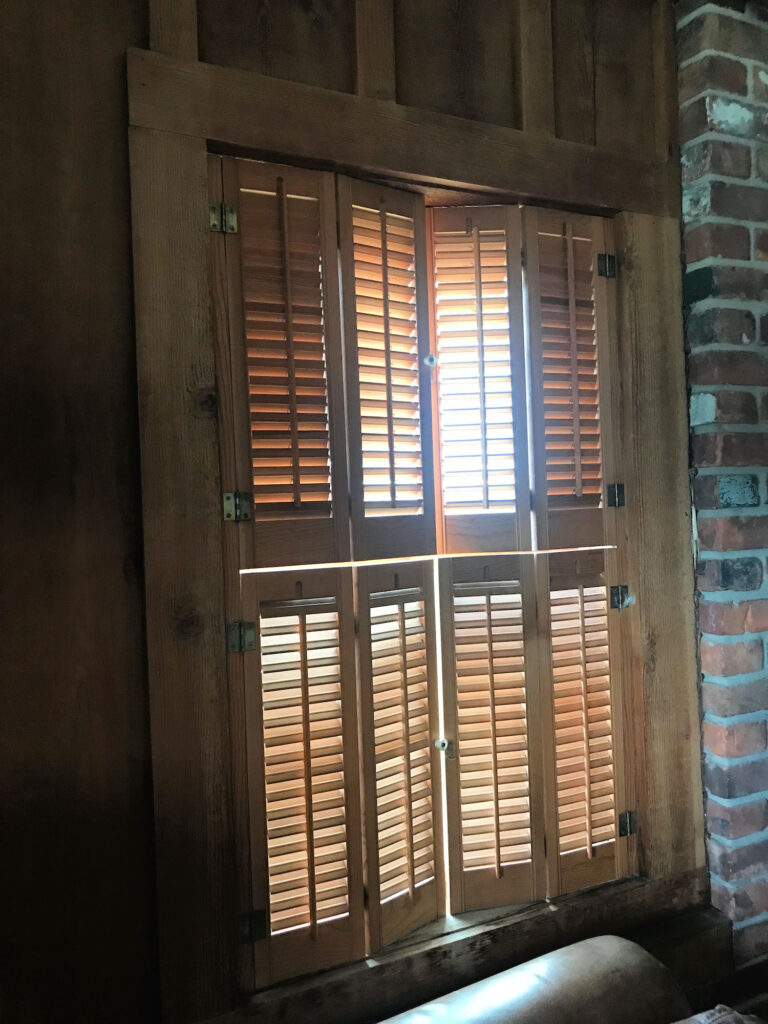
The shutters were clunky, plus they were dark brown in some rooms and lighter brown in others. We took them down since we didn’t have neighbors and they weren’t really “us”. They were shelved in the basement and promptly forgotten about while we started work on our youngest daughter’s bedroom.
Then, earlier this year, the dreaded inevitable happened. A farmer sold vacant land across the street. We held our breath and crossed our fingers that there would be no subdivision built. Goodness knows we have enough of them in our little part of Northwest Ohio! Thankfully, the land was used to build just a handful of homes, but our quiet little corner with an empty field was gone. Which led us to a bit of a quandary. We needed window coverings and stat.
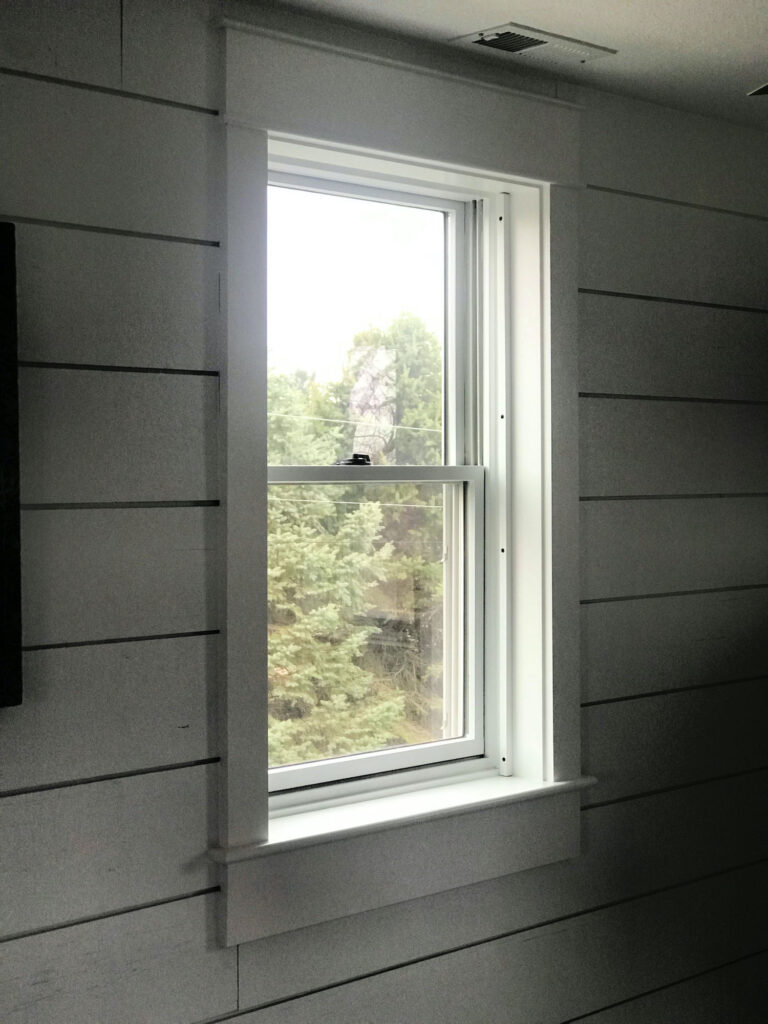
Matt had cased out the inside of the windows so they would have a farmhouse feel. They looked like this, and we loved them!
We spent a lot of time considering curtain rods and various styles of window coverings that might work. I loved the look of antique lace curtains but the fabric was too thin to hang in a bedroom window. I disliked miniblinds. We were running out of options, and then…
We Reconsidered the Plantation Shutters
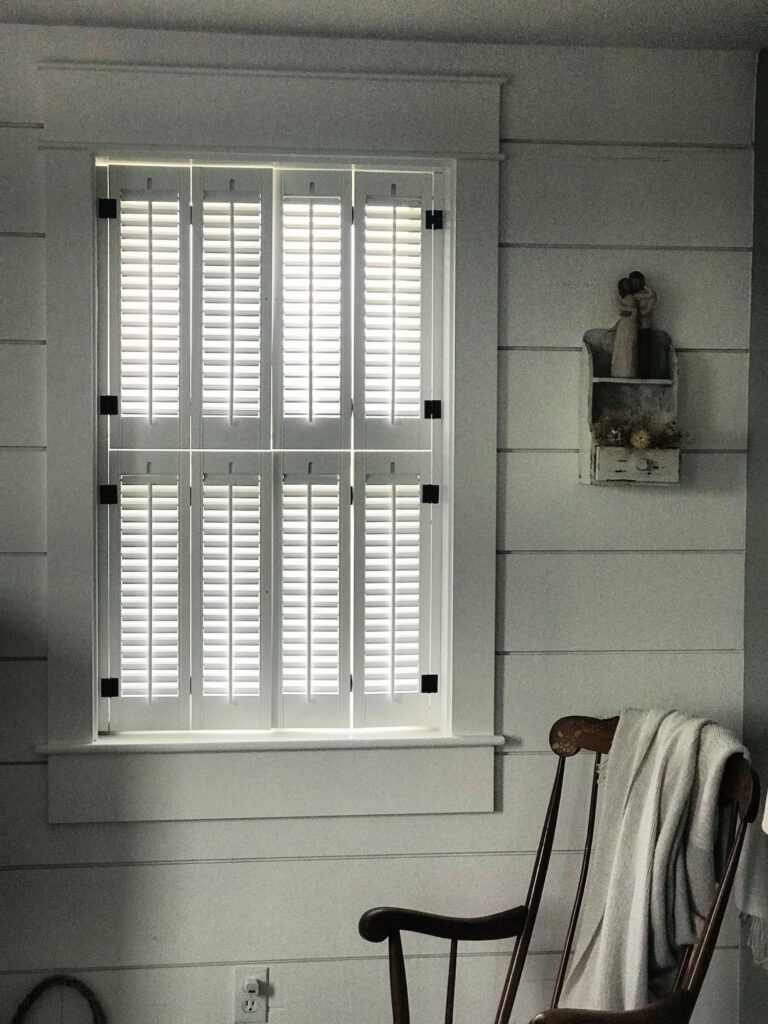
Matt was clearly not onboard when I first mentioned them, but I was warming up to them and simultaneously running out of alternatives. First of all, the plantation shutters had a certain charm. They were also made of solid wood, very likely custom made for the windows, and of good quality. The shutters would give us the privacy we needed and block out the extra light shining in our windows. A quick search on Home Depot’s website showed that plantation shutters when purchased new cost over $300 each! Clearly, what we had to work with was of value. The only real thing we hated about them was the weird brown color. In the big picture, that was no big deal to us, so we got to work.
How We Updated Our Plantation Shutters
The first thing we did was get the plantation shutters out of our basement. We blew all the dust off of them since they sat down there for two years.
There was no way we would have ever painted them with brushes. The time involved in that process combined with the potential to not like the end result were big cons. We wanted a very professional and uniform finish on them. And, of course, because our 120+ year old farmhouse is quite dark, we wanted them to be a bright and cheery white to open up the space as much as possible.
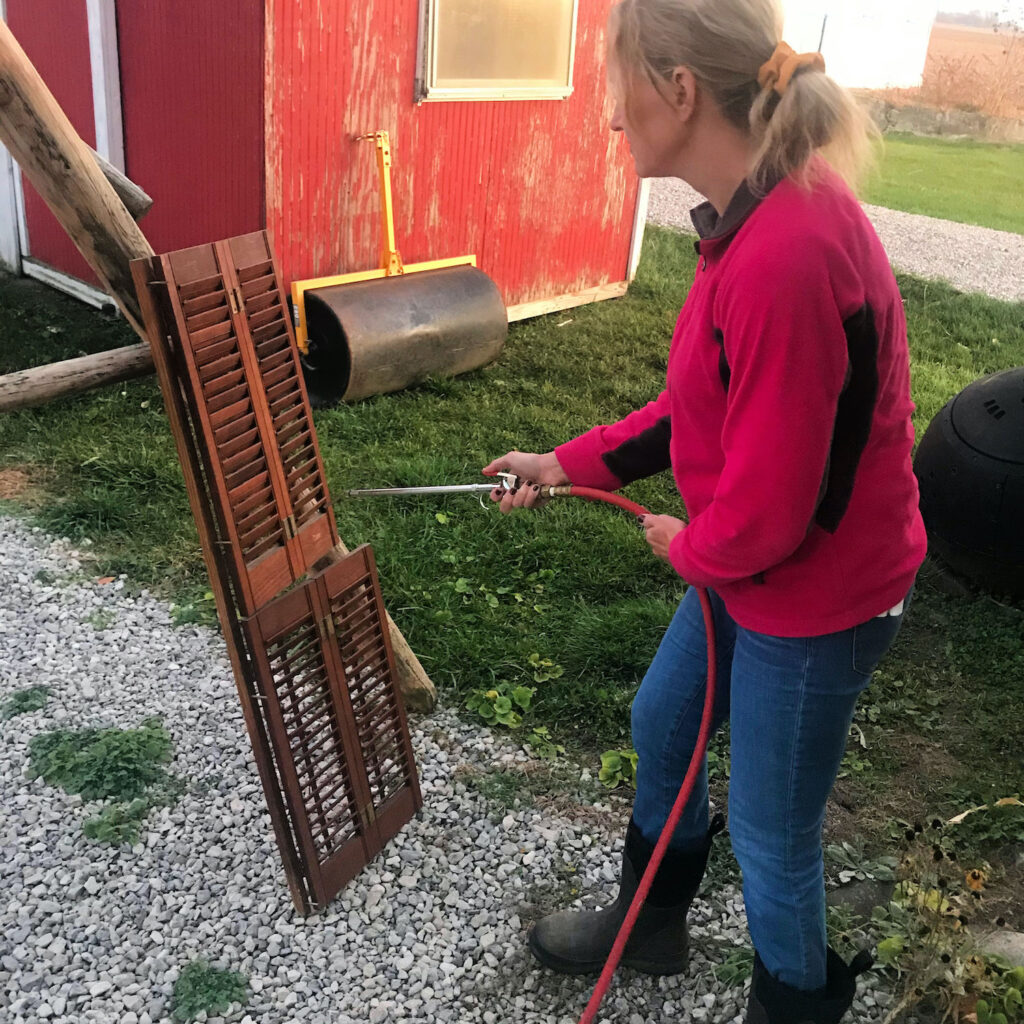
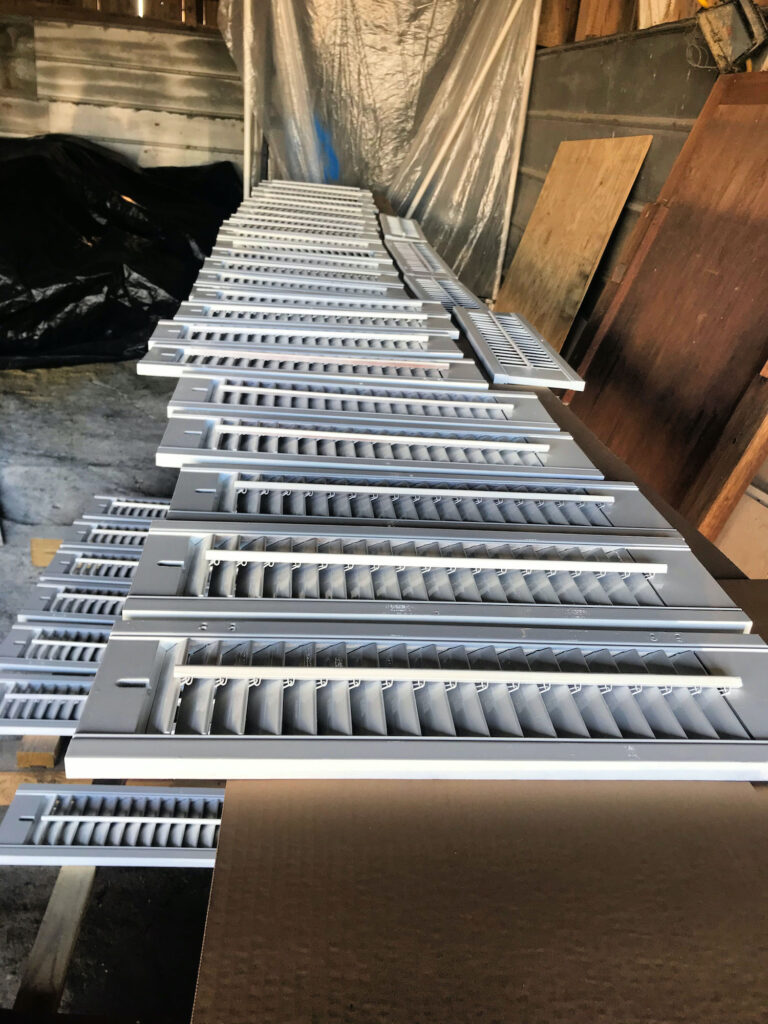
Matt separated the spacers from the shutters and set up an area outside to tackle the painting.
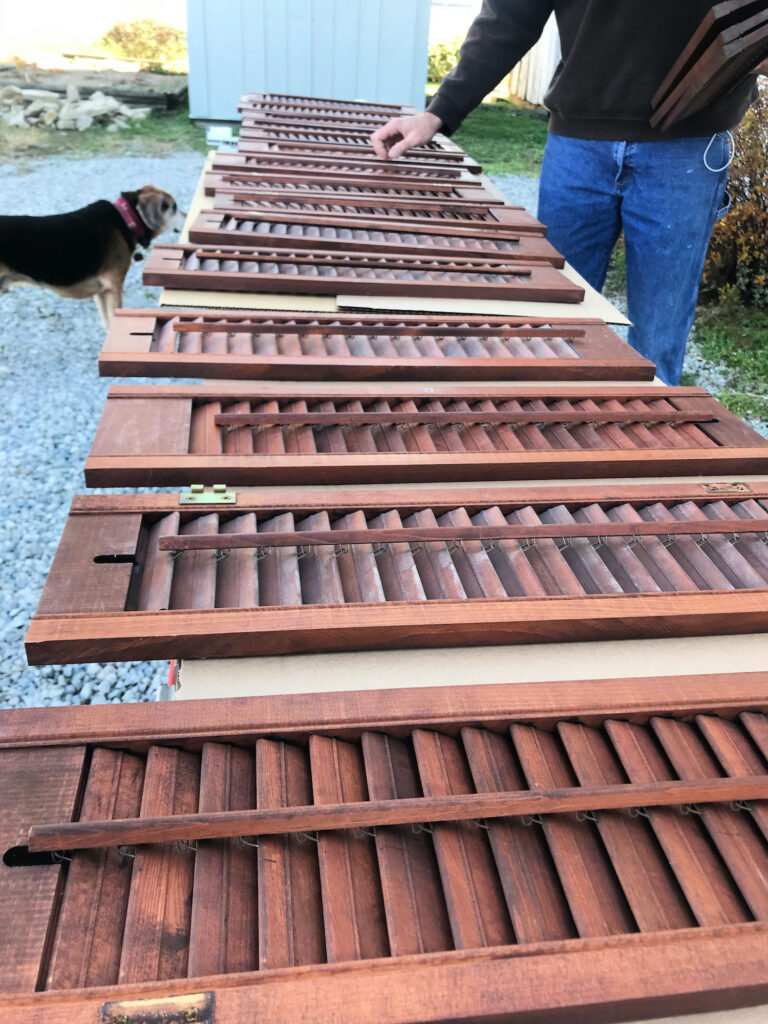
But then the wind started getting out of control so he set up shop inside our giant barn. Matt built a stand of sorts to put each shutter on, making sure the shutter was actually larger than the stand to keep overspray off the painting surface. He shot them with paint in one area so he could move them easily when they were dry. Matt painted the edges first and then painted the faces of the shutters, doing a crosshatch pattern to ensure even coverage. Next, he did the same to the spacers he had separated from the shutters.
The Painting Process
Matt used a Graco 390 Airless Sprayer to do this. We used it in the past to spray all of the trim upstairs, and when we did our farmhouse door facelift. Honestly, this sprayer has been a great investment due to all of the projects we have going on, Renting one would have made sense if we were only doing one makeover. Ha!
Here are the products he used for our plantation shutters if you consider repainting anything similar and want a smooth, professional, and uniform look.
Plantation Shutter Product List
- Primer: Zinsser Bin Shellac Base Primer
- Top Coat: Richards Signature Series Ceramic Satin
- Everbilt Narrow Utility Hinges in Oil Rubbed Bronze
- Sumner Street Latches
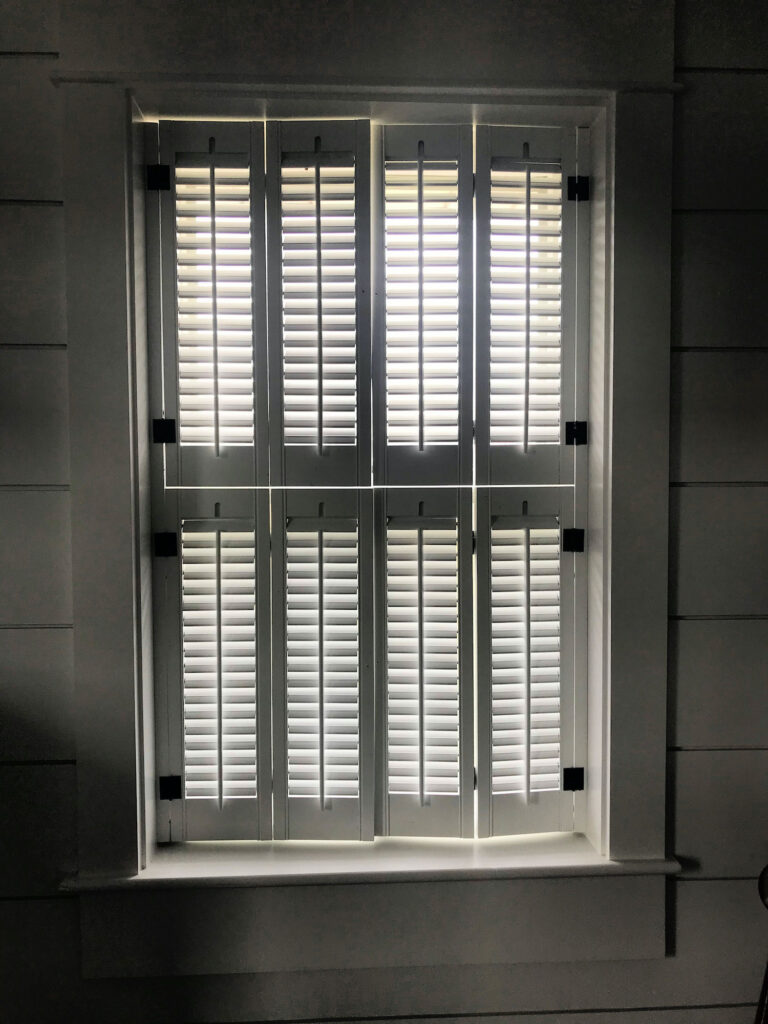
We bought new bronze hinges from Home Depot because we didn’t want the paint to flake off at contact points. The closures on the old shutters didn’t work well, so we sprung for new.
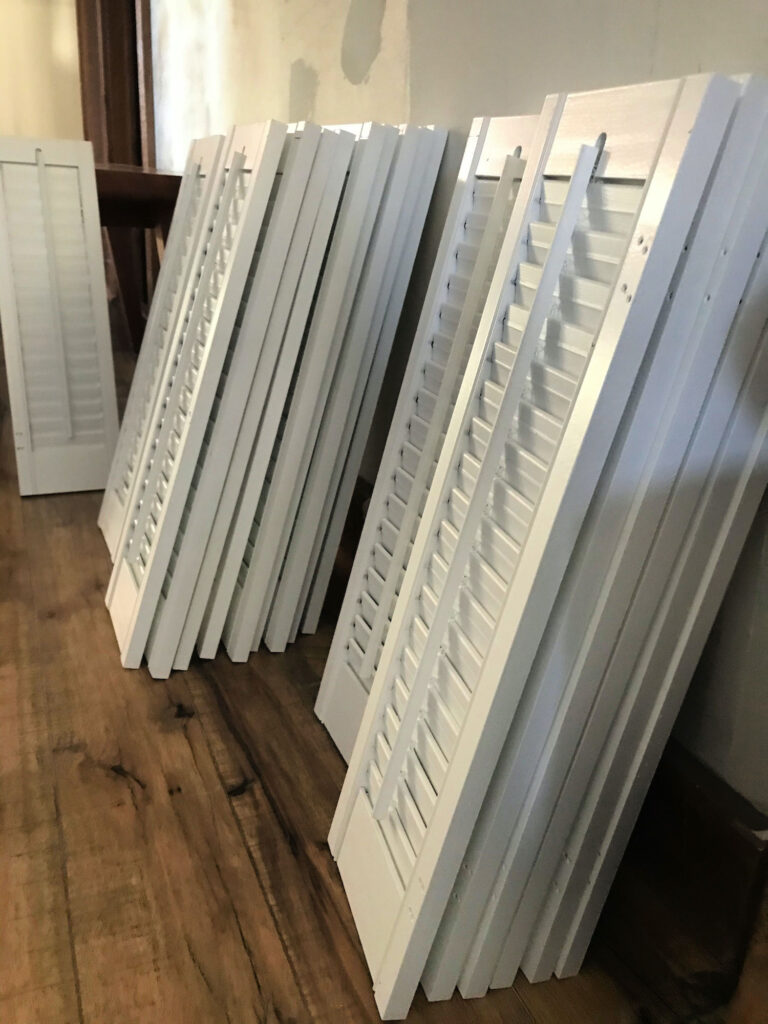
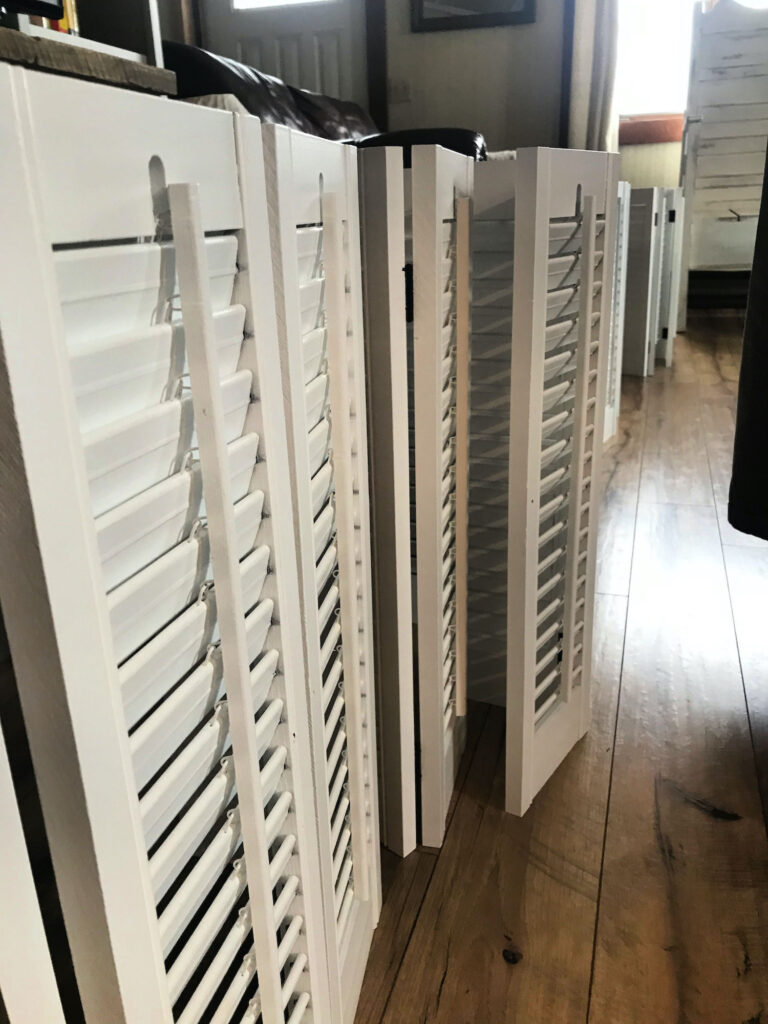
We moved them inside once they were dry, lining them up in the hallway until we had everything we needed to hang them back up. Then we moved them to his new workstation, which just happened to be our living room. Sigh. The concessions you make when things are “under construction.”
Watch the Video
It’s crazy how in the end, using the window coverings we had and giving them a facelift worked in our favor in so many ways. I’m so glad we decided to store those old shutters in the basement instead of just tossing them out. The cost of our makeover was minimal and I love how these look in our bedroom now. Bright white paint really freshened them up and the bronze hinges are timeless. They look brand new! Who really wanted curtains anyway?
Have you breathed new life into something you were going to throw away? I’d love to hear what you did in the comments.
These look great Angie! So fresh and bright!
Thanks, Kim. I am so glad we decided to stick with these and paint them. They really do blend well and Matt did a great job!