Restoring a farmhouse fixer-upper is no easy feat. Sometimes, however, we’re blessed with little projects that make a very big difference. Case in point? Our interior doors that were in need of a farmhouse door facelift.
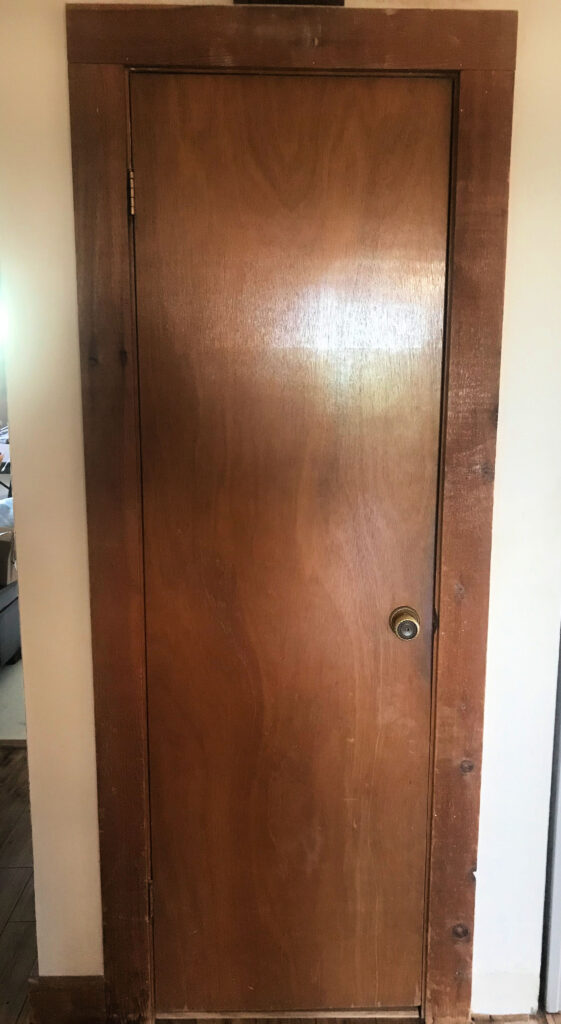
At some point, former owners replaced any original doors in this house with these, which likely happened in the 1970s. Pretty boring door, right?

Every single door in the place looked like this. Where was the farmhouse charm? I had been hoping to find an original door we could salvage, especially when we did one of our barn cleanouts. No such luck. Rather than replacing every single one of these, though, we decided to wield some DIY magic on them instead. Because who wants to spend a lot of money on interior doors? Not this girl.
How to Give a Boring Door a Farmhouse Door Facelift
- First, remove the door and any hardware from the frame.
- Next, wipe the door down with denatured alcohol. This removes any fingerprints, film from cleaners, and the like so there are no chemical reactions with the primer or paint. See the notes below on why this is important.
- Sand the door’s surface with 150 grit sandpaper.
- Wipe the door down again with another pass of denatured alcohol to get rid of dust and grit on the surface.
- Know the style you’re going for. We did some Pinterest sleuthing to find doors we liked and then figured out dimensions from there.
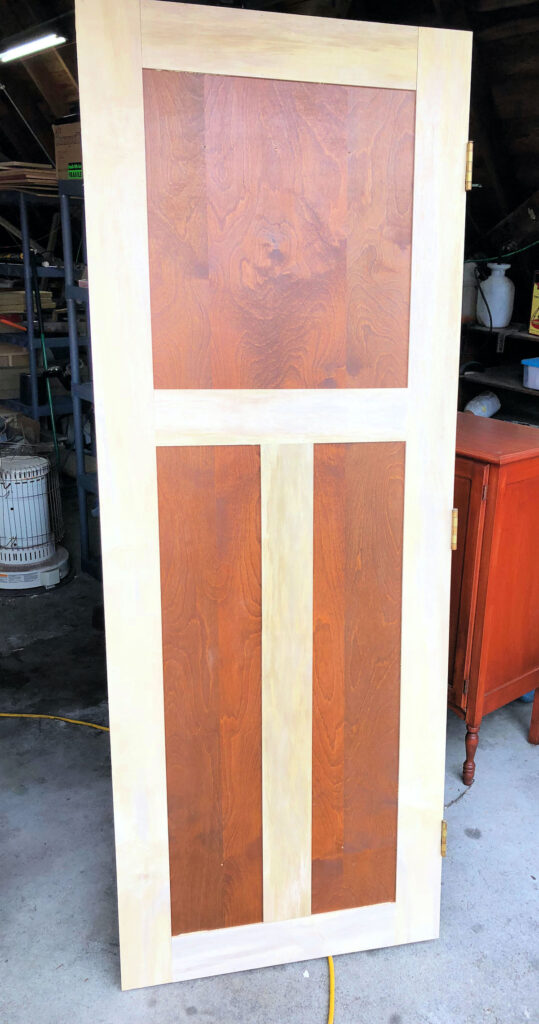
- Cut 1/4″ thick Sande plywood into strips to match your dimensions. We did this from a sheet of 4′ x 8′ plywood with a table saw. Our strips are 4.5″ wide. Our doors are 30″ wide x 80″ tall.
- Frame out the door.
Here’s How It Should Look and Next Steps

- Glue and nail the strips down and fill the holes with wood filler. Alternatively, you can use spackle.
- If you have any bad edges, you can add a bead of caulk to hide them.
- Spray the doors with a high solids content primer. We used Bullseye 1-2-3 Plus and a Graco 390 airless sprayer, using a fine finish, low pressure 310 tip. See notes about spraying vs. painting with a brush.
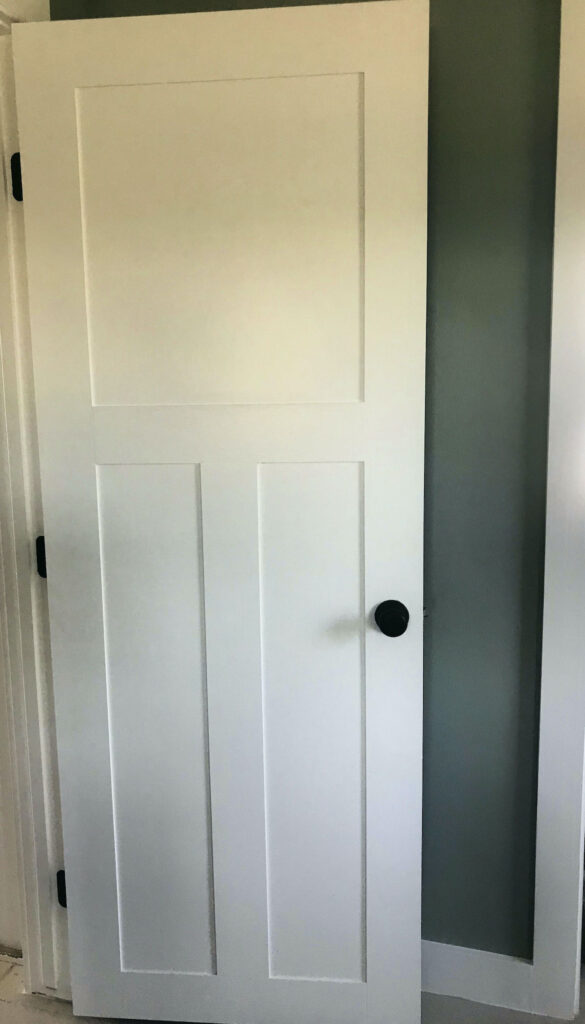
- Next, paint with 2 coats of paint. We used Richard’s Signature Series plus Ceramic paint in a satin finish, waiting a day in between coats for thorough drying.
- Replace knobs and hinges. We chose these simple and timeless black knobs from Lowe’s.
- Finally, re-hang and adjust your door stops out to account for the thickness of the new door.
- Admire your handiwork.
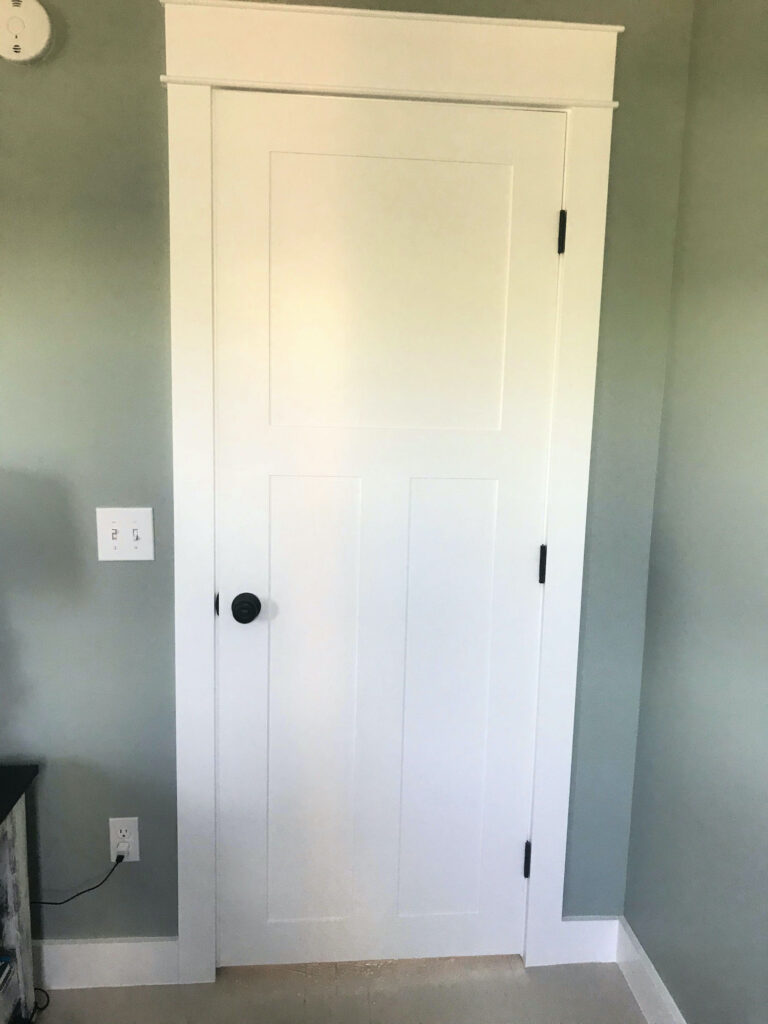
Can you believe this after photo?


What a difference, right? We love the way the white looks clean and fresh and the framing on this door definitely says farmhouse now. Best of all, with just a little work on our end, we saved substantial dollars and saved all the doors from going to a scrapyard.
A Few Helpful Notes
- ALWAYS take the time to prep a surface you’re going to paint. If you don’t, everything from the finish to the adhesion of the product could go wrong. My mom used to say “an ounce of prevention is worth a pound of cure” and she was right, darn it!
- If you don’t have a table saw, ask a handy friend or call your local lumber store. Many will cut to spec.
- You can paint your doors with a brush or roller, but they do look better sprayed. Because we’re doing a lot of renovation in this house, it made sense for us to buy a better sprayer that we could use for multiple projects. They are not cheap, but as a more affordable option, you can rent one.
We’ll be sharing more of these DIY projects soon, so you can learn to work with what you have as an alternative to always buying new. Stay tuned!

Yes girl! Beautiful! I am in awe of you & your abilities!!