
Figuring out how to remodel a staircase wasn’t the first thing on our list of renovation priorities here at Sunny Side Up. When we first moved in, there was old carpet running up the stairs. And I mean OLD! Our simple first step was ripping that old carpet out! If you’ve ever pulled out an old carpet, you know it’s a messy, strenuous chore. Let me tell you, though, it’s one thing to pull out the old carpet you put down yourself years ago. It’s quite another to pull out someone else’s old carpet. Enough said! I’ll never forget the hours we spent on that nasty task or the lineup of rolled-up carpet at the end of our driveway on trash day.
Flooring Reveal
Needless to say, the wood under the carpet was pretty chewed up. We could tell the staircase was only meant for carpet, to begin with. The original treads were made from cheap pine. They were creaky and not in great shape by the time we were done tearing out the carpet. They had staple marks all over them. We knew, even back then, that we wanted to totally transform even the small spaces in our house, but we weren’t quite ready to tackle the stairs. So we did the next best thing and painted them! That was a good move. We could cover up the ugly flooring. Plus, it bought us some time while we worked on the all-important upstairs bedrooms and our bathroom renovations. In this photo, we already started a tear-out, hence why it looks so rough, but you get the picture.
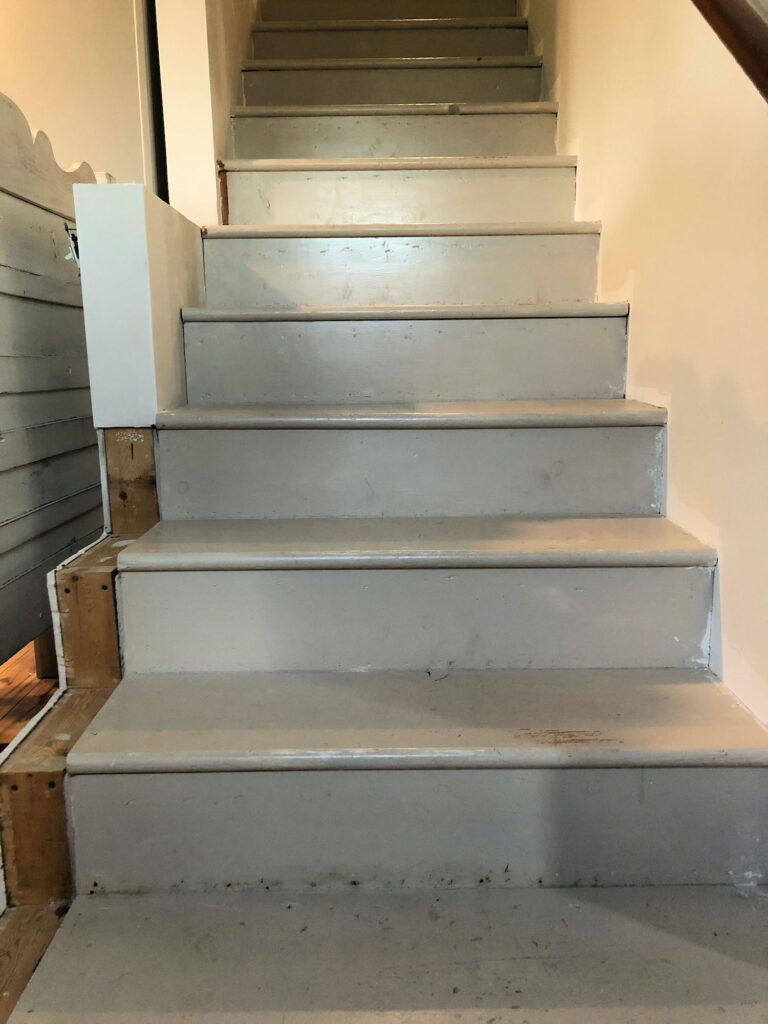
Toward the end of last year, we were finally ready to shop for replacement flooring. It had become painfully evident that we were not going to be the lucky people discovering beautiful hardwood floors under carpet layers. No Chip and Jo good luck for us. But we DID find some flooring we loved, and we just found out it’s finally ready for us to pick up this week. Hurray!
Staircase Remodeling Steps
Decisions and Purchasing
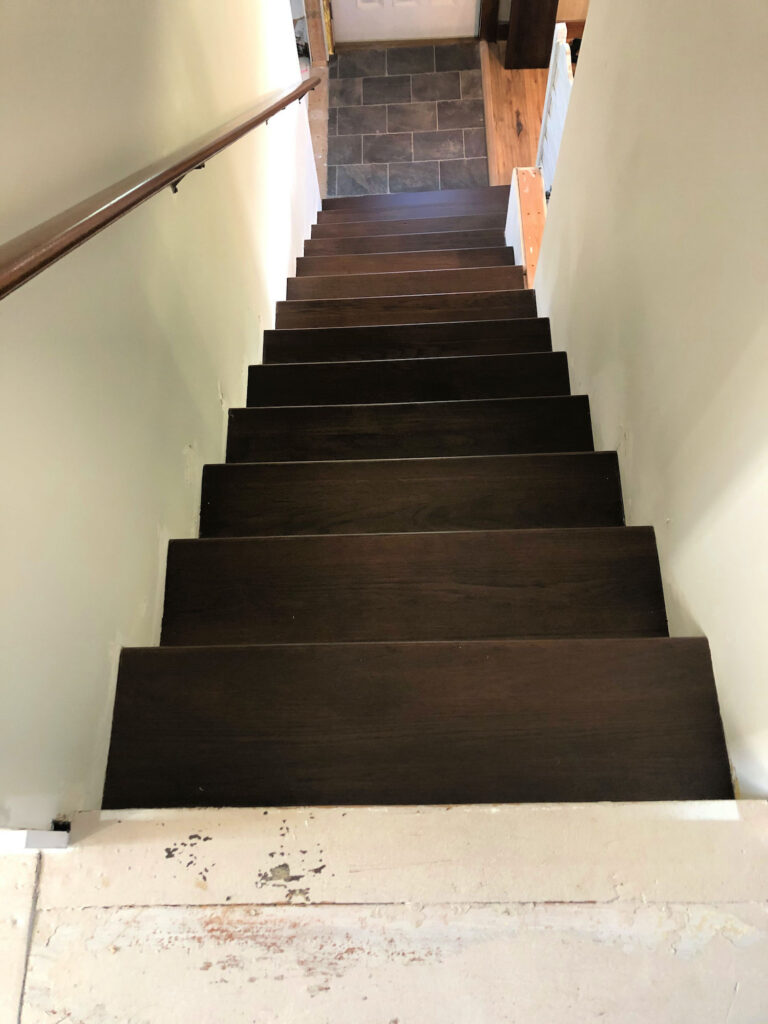
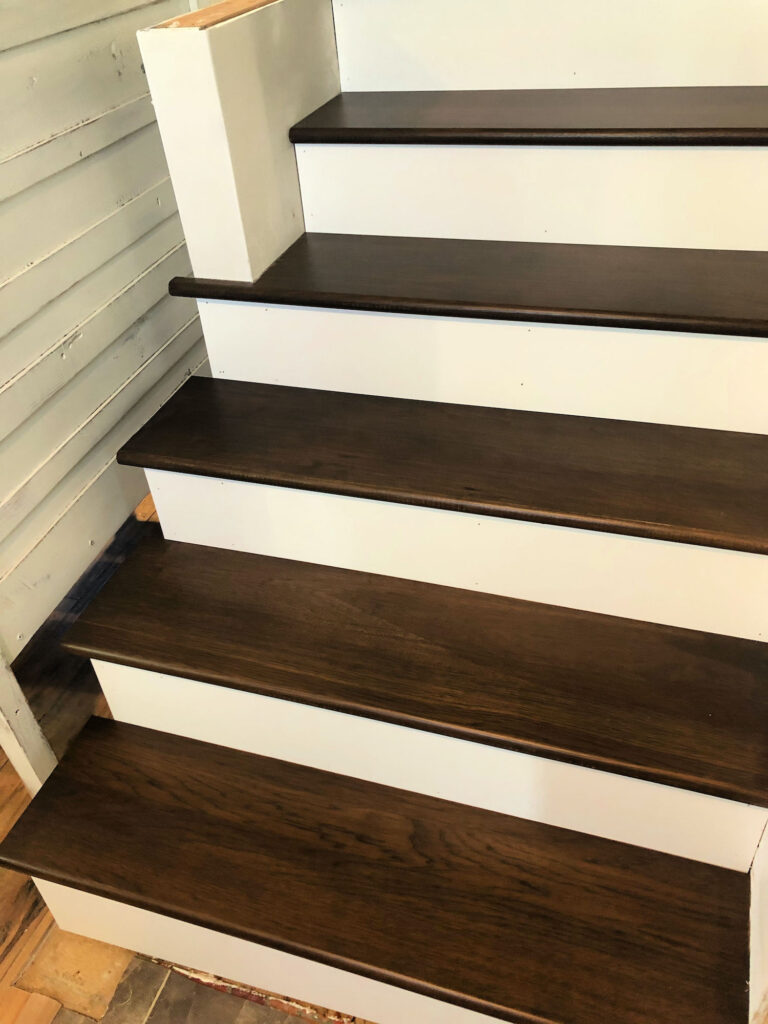
The first thing we did was price out materials. After encountering some frustration at big-box retailers, we decided to purchase hickory stair treads from 84 Lumber. We liked the fact that we could get what we needed quickly, the selection was better, and the staff was far more knowledgeable. Matt also ordered some 1’x8′ poplar boards to cut down for the risers. We also chose a dark brown stain that complements the flooring for the treads. It’s the deep and rich color you would have seen in an authentic late 1800s farmhouse. We made sure to line up all of our tools and supplies so we would be ready at “go” time.
Shopping Links for Tools and Supplies
This post includes affiliate links. When you make a purchase from my links, you won’t pay any extra but I will make a small amount that will help keep my little blog active!
Preparation Steps
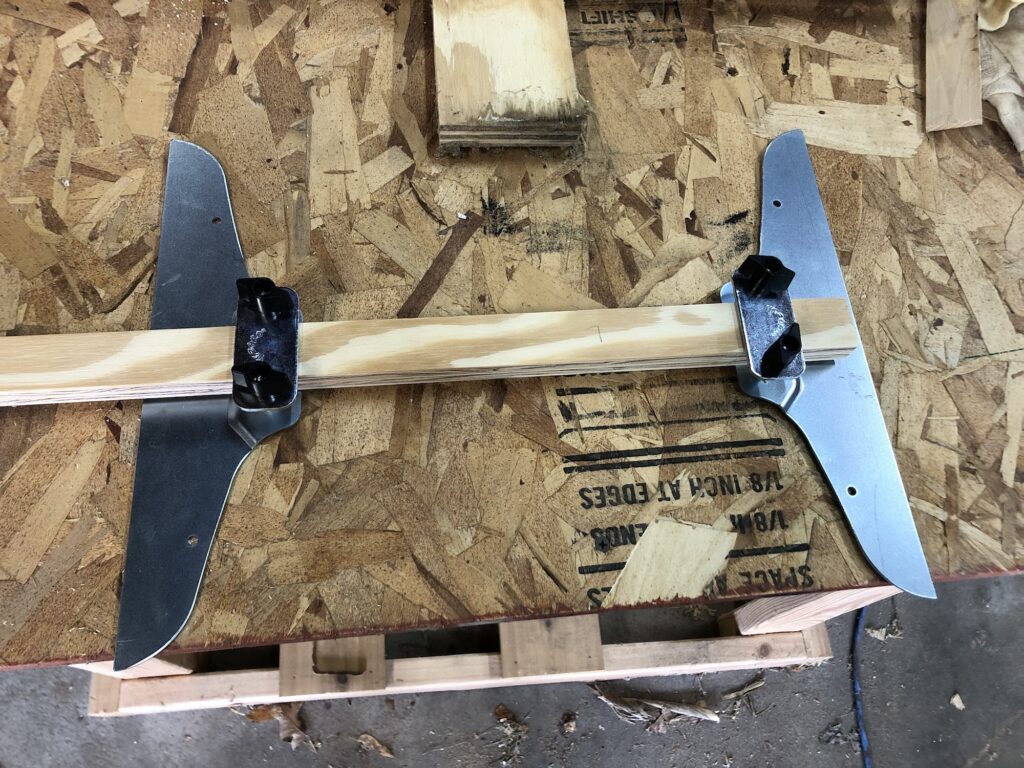
Matt is really meticulous when it comes to preparing surfaces. It’s super smart to not skip this step so products perform at their best when applied. When it came time to cut the treads, the template we purchased came in really handy. By using it, he was able to see how wide each tread needed to be cut. Each tread can be slightly different! Most of our treads ended up being a degree or two off from 90 degrees.
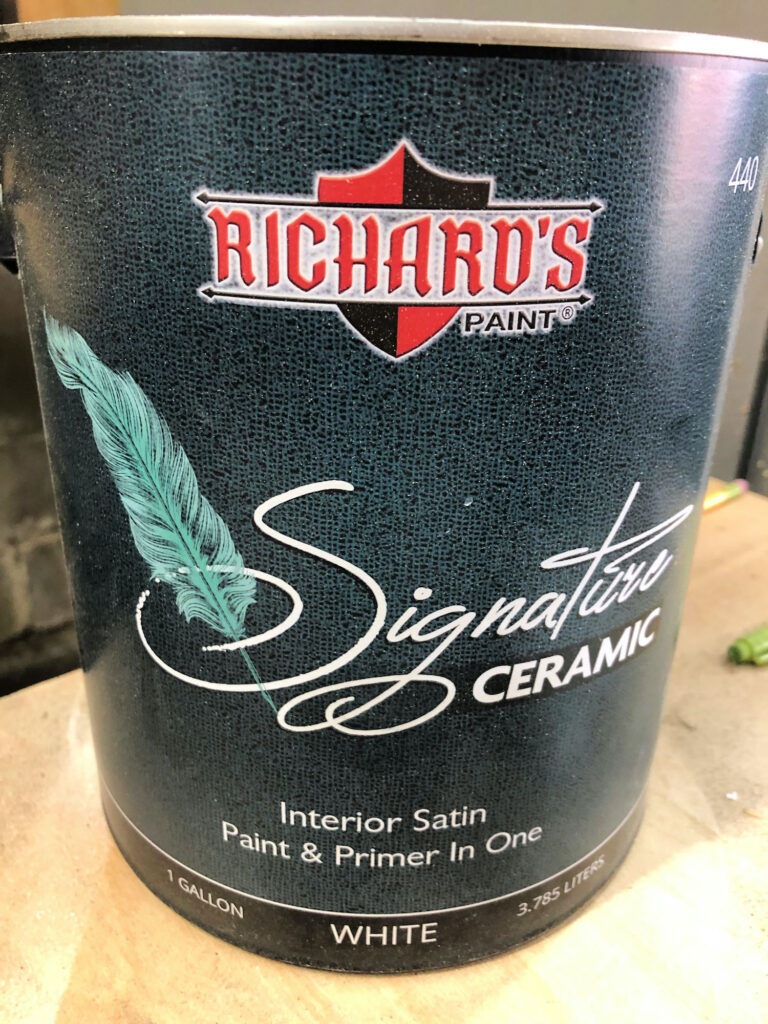
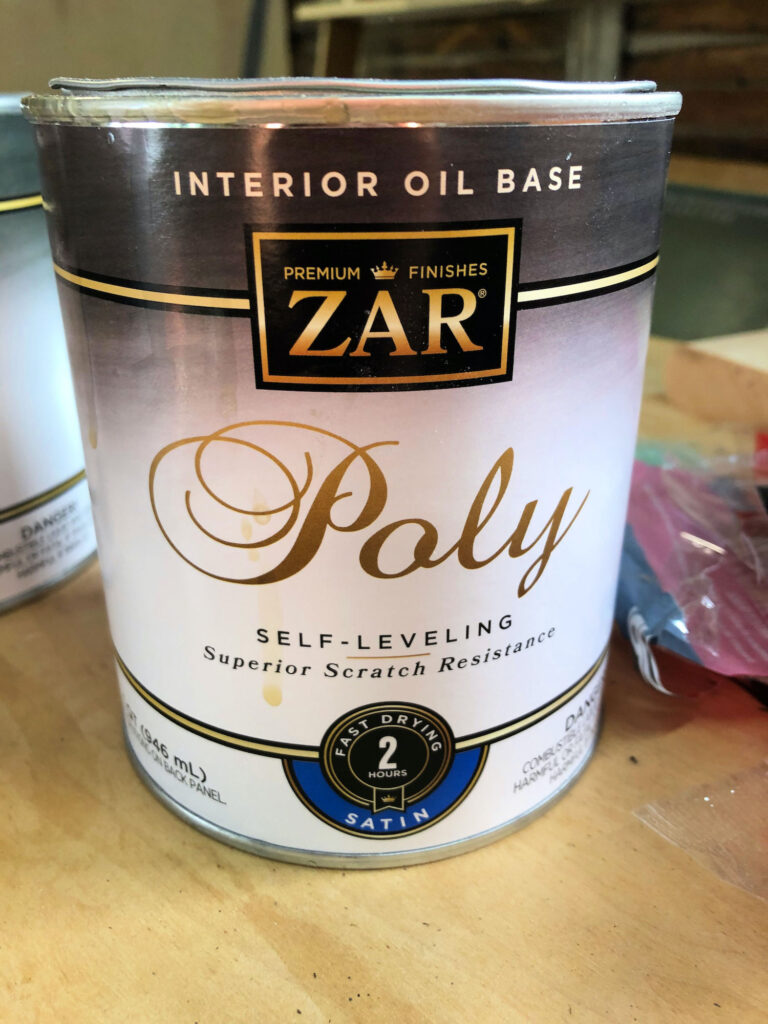
Within the cutting process, Matt had to figure out the depth of all the treads and cut the treads with a five-degree angle. This was to control the glue during installation. Once that was done, he stained them all and then applied three coats of UGL. On the last coat, he applied an antique, matte finish for the non-shiny look we wanted. In between coats, he sanded the surface. He started with 220 grit sandpaper after the first coat of poly, then 320 paper after the second coat, using a tack rag to wipe away sanding dust in between coats. He primed and painted the riser boards before installing so they would be ready to go.
Steps to Remodel a Staircase
Normally, if you’re going to remodel a staircase, you start at the bottom and work your way up. However, this is the only staircase going upstairs, and this was the first time we were doing any kind of stair remodel. We’re DIYers, and we weren’t sure how long it would take, so we started at the top instead.
- Matt started at the top and tore out two treads and two risers so he could have an area to work in.
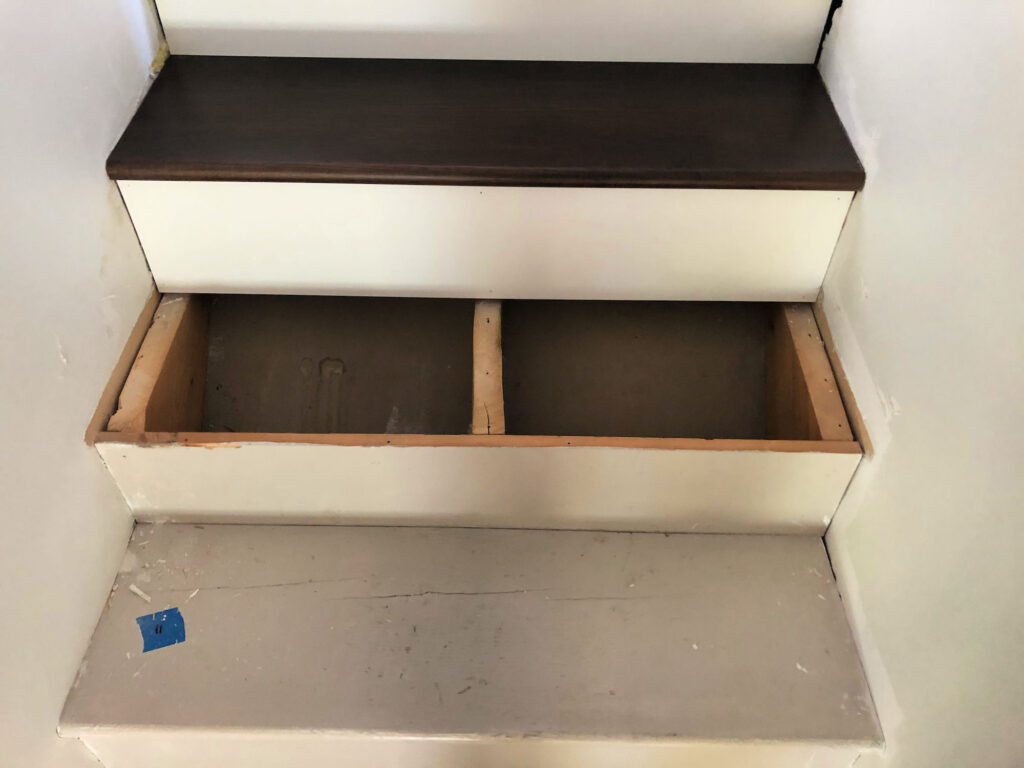
- As he worked down, he glued his riser board with Liquid Nails and nailed it in place to sit flush against the top tread.
- When he was ready to install each tread, he put a bead of Liquid Nails on the low edge of each riser and a generous amount of glue on the horizontal part of the stringers. The five-degree angle on the back of the tread kept the excess glue from pushing up to the visible part of the riser. He used one tube for every two treads to give you an idea of how much glue we went through. This step ensured no creaking stairs in our future!
- He repeated the process as he worked down.
This whole part of the project took the better part of the day.
What’s Next
Our next steps are filling the nail holes on the risers, painting the upstairs landing, patching the walls, and painting them. After that’s done, we’ll be ready to install a new handrail. You’ll have to stay tuned for the next phase of how to remodel a staircase, but we’re already loving how quiet and simply beautiful it is. It’s already given this little farmhouse some extra grace and simple elegance! And we love the classic farmhouse look.
Leave a Reply