
Here at Sunny Side Up, we have an abundance of gardening space. From herbs growing with my flowers to a smaller plot near the chicken coop, to the larger garden near the compost bins, and that’s not even all of them. I love gardening and am passionate about growing as much of my own fruit and vegetables as possible. However, I know not everyone has the garden space, patience, or tenacity that we have. So, I was really excited when I stumbled across this amazing vertical garden planter, GreenStalk, made in Tennessee. If you want to try gardening but have limited space, this could be just the thing that gets you to love it too!
How to Assemble the GreenStalk Planter

The GreenStalk planter can be ordered with 3, 4, or 5 tiers and in green, stone, or terra cotta. We went with the stone color. It comes together easily and directions are included in the packaging. Here’s the process:
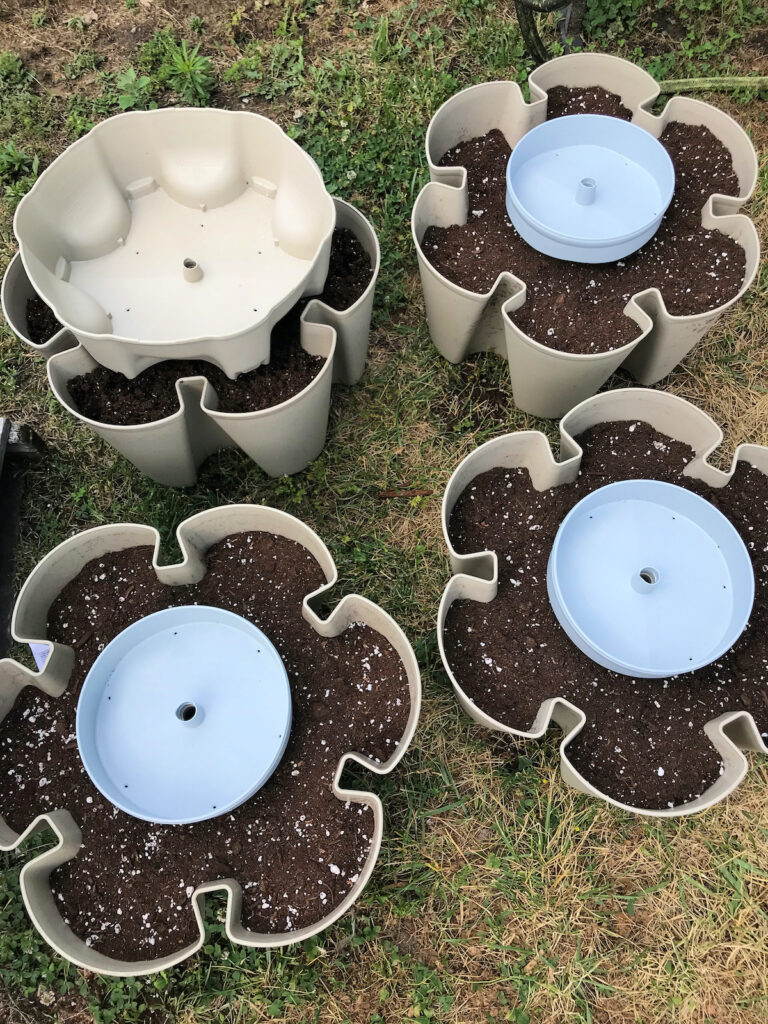
- Start by laying all of the pieces. You’ll see that there are larger sections, some disks, and one smaller section.
- Fill each large tier that’s the same size with soil. I’m growing vegetables in mine, so I used Bacto Organic Soil. I don’t want anything that I grow to have any kind of commercial fertilizer added. Fill each tier close to the top.
- Plant seeds in each of the pockets of the tier. If a vegetable or fruit is going to be large when fully grown, add just one seed. If it’s a smaller item, like carrots or radishes, add up to 3 seeds in each pocket. You can also plant seedlings if you don’t want to grow from seeds. The GreenStalk came with a small packet of organic plant food that I used in one of the tiers. I added my own organic plant food to the rest.
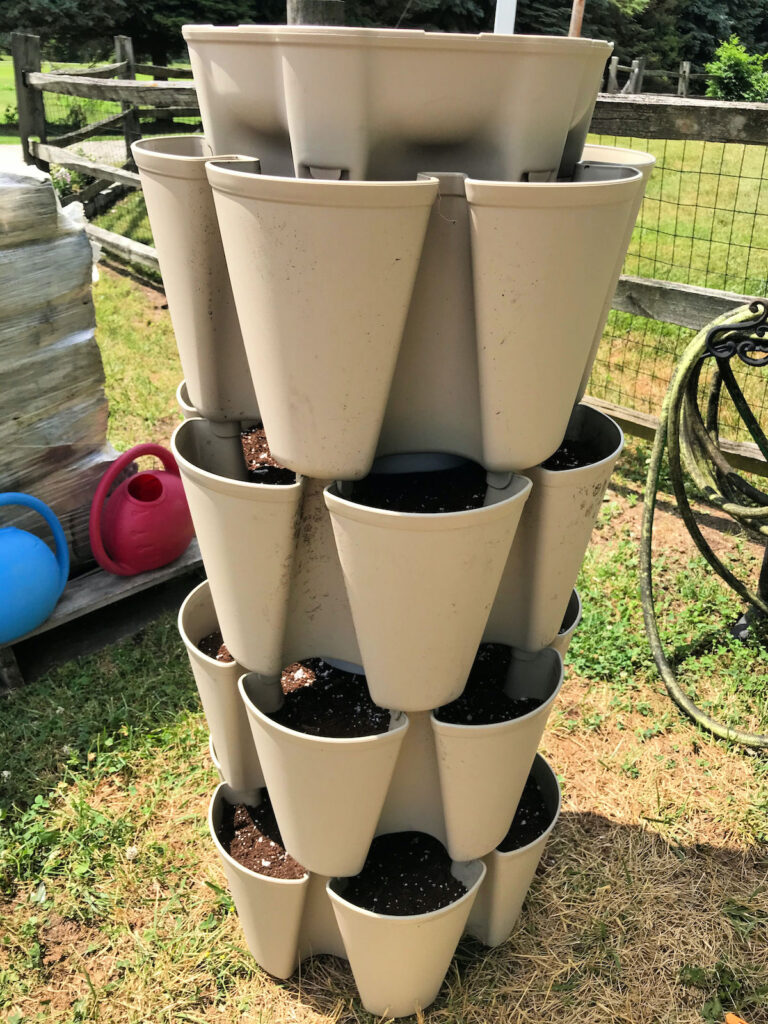
- Once all of your seeds are planted, stack the tiers on top of each other, inserting a disk in between each one. As you stack tiers, make sure they lock into place.
- Add the top tier watering reservoir, which does not fit into place like the rest of the pieces.
- Add water to the reservoir, enough to go up the line that matches the number of tiers your planter has. If you’re planting from seed, you can mist the soil until you have sprouting plants.
- The water trickles down from tier to tier, watering your freshly seeded soil.
Watch Me Assemble the GreenStalk
Why a Vertical Garden Planter Made Sense for Us to Add to Our Gardening Plan
As I mentioned, we have nothing but gardening space here at Sunny Side Up. However, some of what we plant just does better in planters or pots, at least to get the plants off to a great start when they are supposed to be sown directly. We were completely overwhelmed the first year we took a stab at gardening from seed. Turns out we are champion weed growers! A vertical planter helps us grow a few vegetables directly in the soil in a contained, small area, and the fact that they are off the ground keeps the weeds at bay.
A Vertical Garden Planter May Work for You if You:
- Want to start growing a few vegetables or fruits but don’t have a lot of space or want to tear up a section of your yard to put in a garden.
- Struggle with wildlife getting into all of your fruits and veggies.
- Only want to grow a few things and want to have it all organized and within easy reach.
- Want the end result to look attractive. Check out the photos here for inspiration.
A Few Other Notes on This Vertical Garden Planter
- Order a rolling base if you want to move your GreenStalk around. We have ours on a flat patio area that gets a lot of sun.
- The GreenStalk is guaranteed not to crack or fade for at least 5 years after purchase.
- Do not assemble it unfilled.
In a future post, I’ll show you how everything is growing. The GreenStalk would also make a great gift, so consider sharing this post with a green-thumb friend or wannabe! You can even get $10 off by using Code SUNNY10 at checkout.
What would you plant in it?
Disclosure: This post contains affiliate links. I earn a small commission when you purchase at no additional cost to you. I only share my honest opinions of any product I mention or promote in this blog.
Leave a Reply